Admin or manager · ~10 min
Roster — departments, assign, plan, publish
Roster is the planned week (who should work when). Attendance is what actually happened. Follow this order: departments → assign people → choose planners → plan → publish → share.
Step 1
Where to open Roster
Admin: top menu → Roster. Manager: Roster. Use the branch switcher so you are planning the right shop. Staff with Plan roster see a planner link if you assigned them.
Step 2
Step A — Create departments
Tap Departments (or Settings → Open departments). Create names like Kitchen, Front, Counter (max 5). Tap Create for each. Without departments, planning by team is harder.
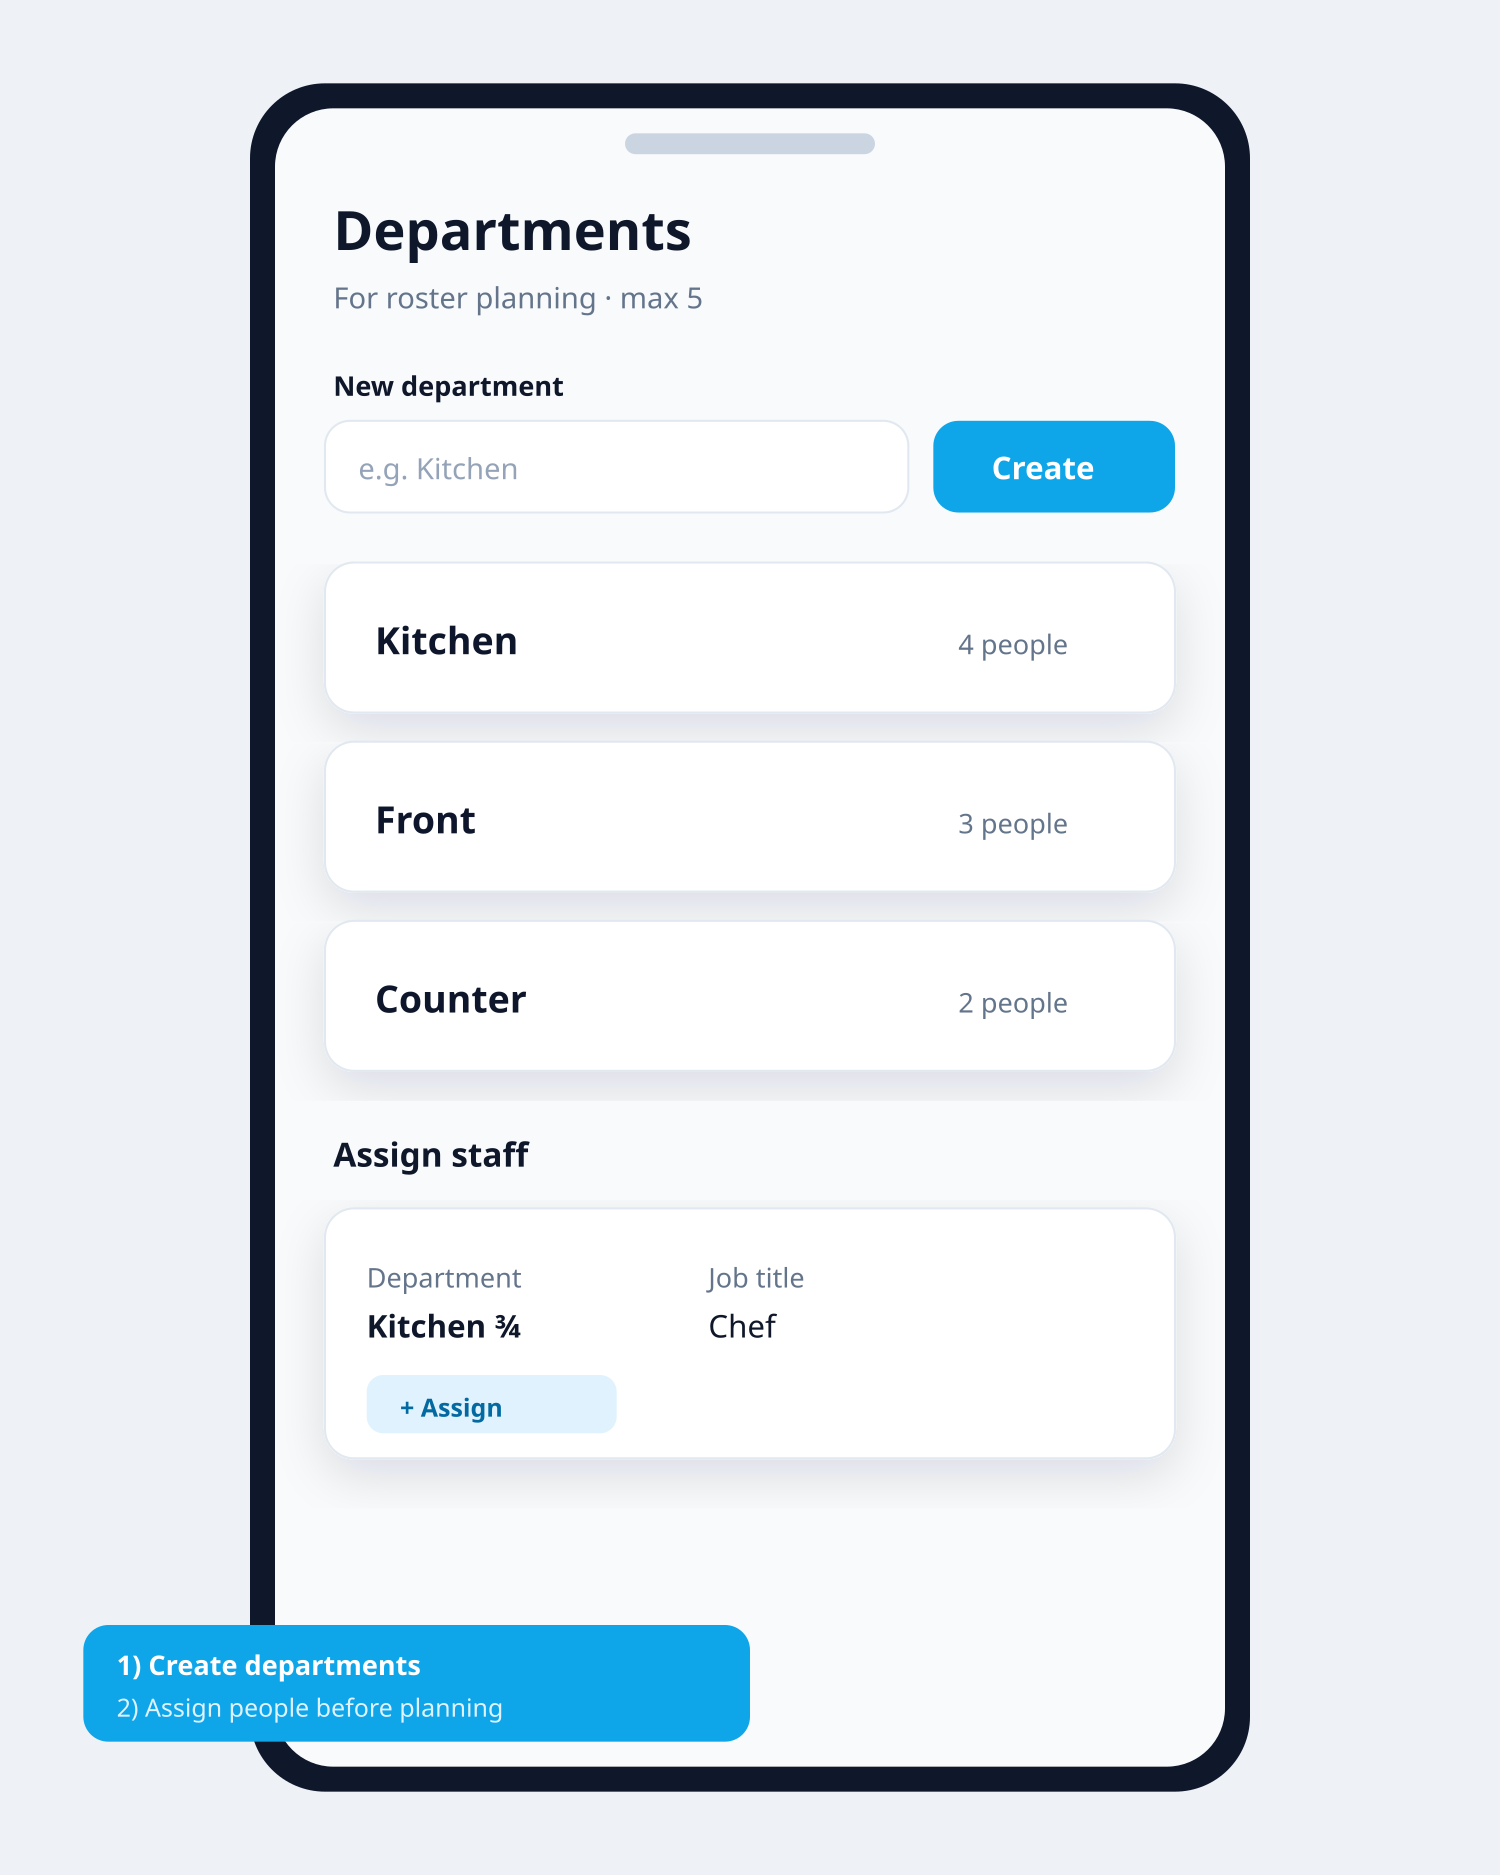
Create departments, then assign people Step 3
Step B — Assign staff to departments
On the Departments page, use Assign staff: pick a department and optional job title (e.g. Chef). Assign people for the active branch. Everyone who works that shop should land in a department.
Step 4
Step C — Assign who can plan (admin)
On Roster, open the Roster planners card — or use the planner fields on Departments. Rules: Admin can always plan every shop. Manager plans their own shop. You may give up to 15 staff permission to plan all shops (Add more staff for roster, type to find a name), and 1 staff + manager for this shop. Optional: one local planner per department. Managers cannot assign planners.
Step 5
Step D — Plan the week
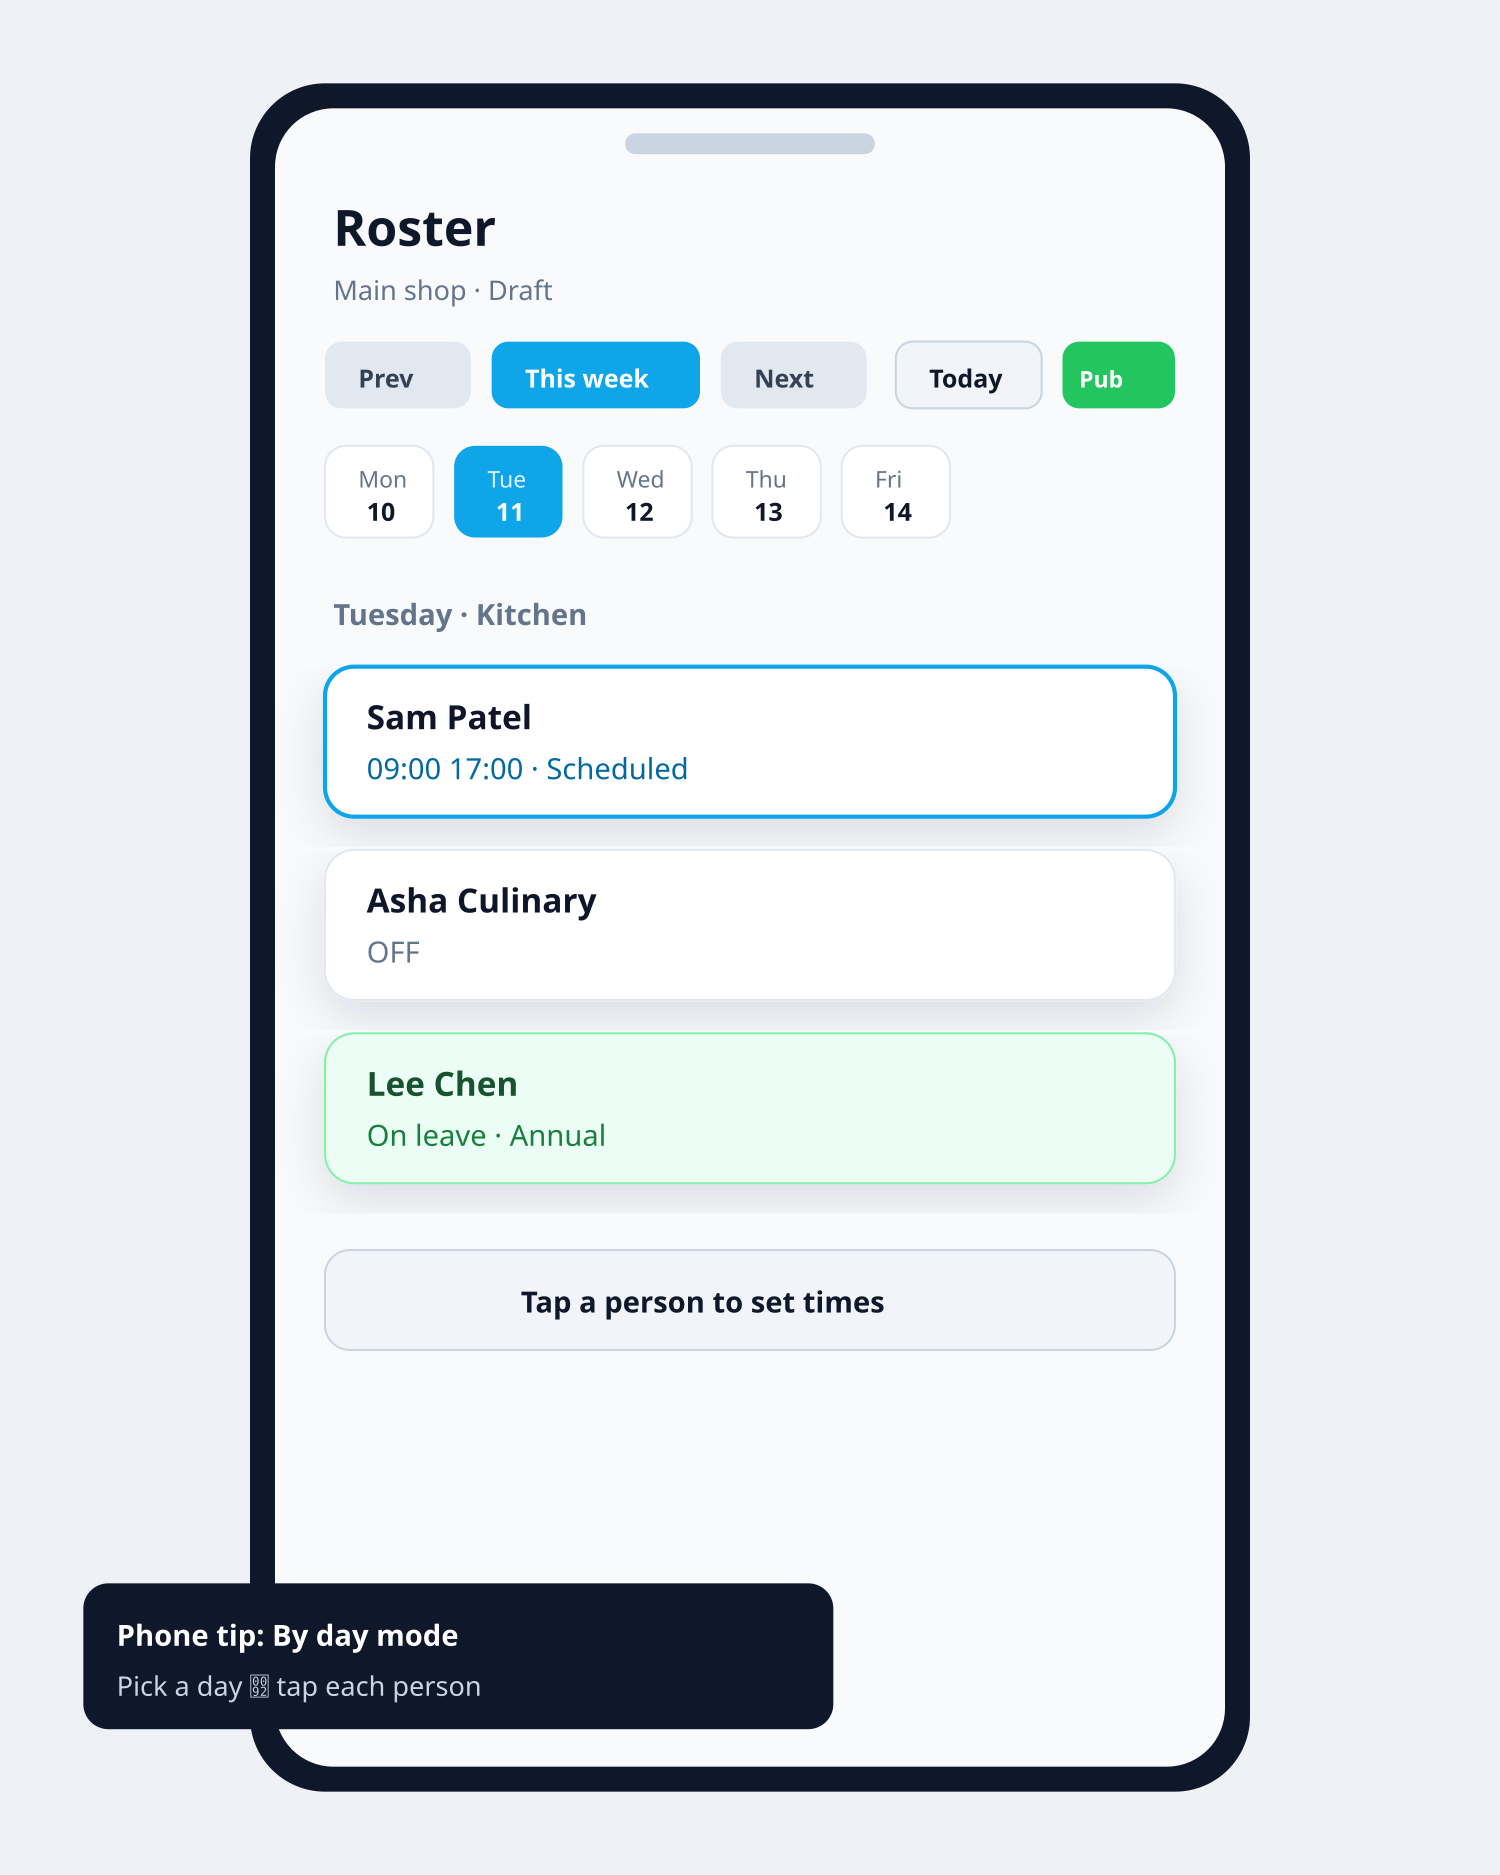
Open Roster for the week (Prev / This week / Next). On phone, use By day: pick a day, then tap each person to set Scheduled, OFF, Unavailable, or custom times. Desktop shows a week grid. Use Quick sets or Copy week to speed up (copy skips days with approved leave).
Tap a person to set their times Step 6
Leave on the roster
Approved leave appears as On leave with the leave type. That is planned absence — not a shift. If you must put hours over leave, you may need Override & save (admin/manager). Prefer fixing leave first.
Step 7
Step E — Publish
When the week looks right, tap Publish. Read the checklist (scheduled people, leave days, warnings). Confirm publish. Status moves from Draft to Published so staff can see My Roster.
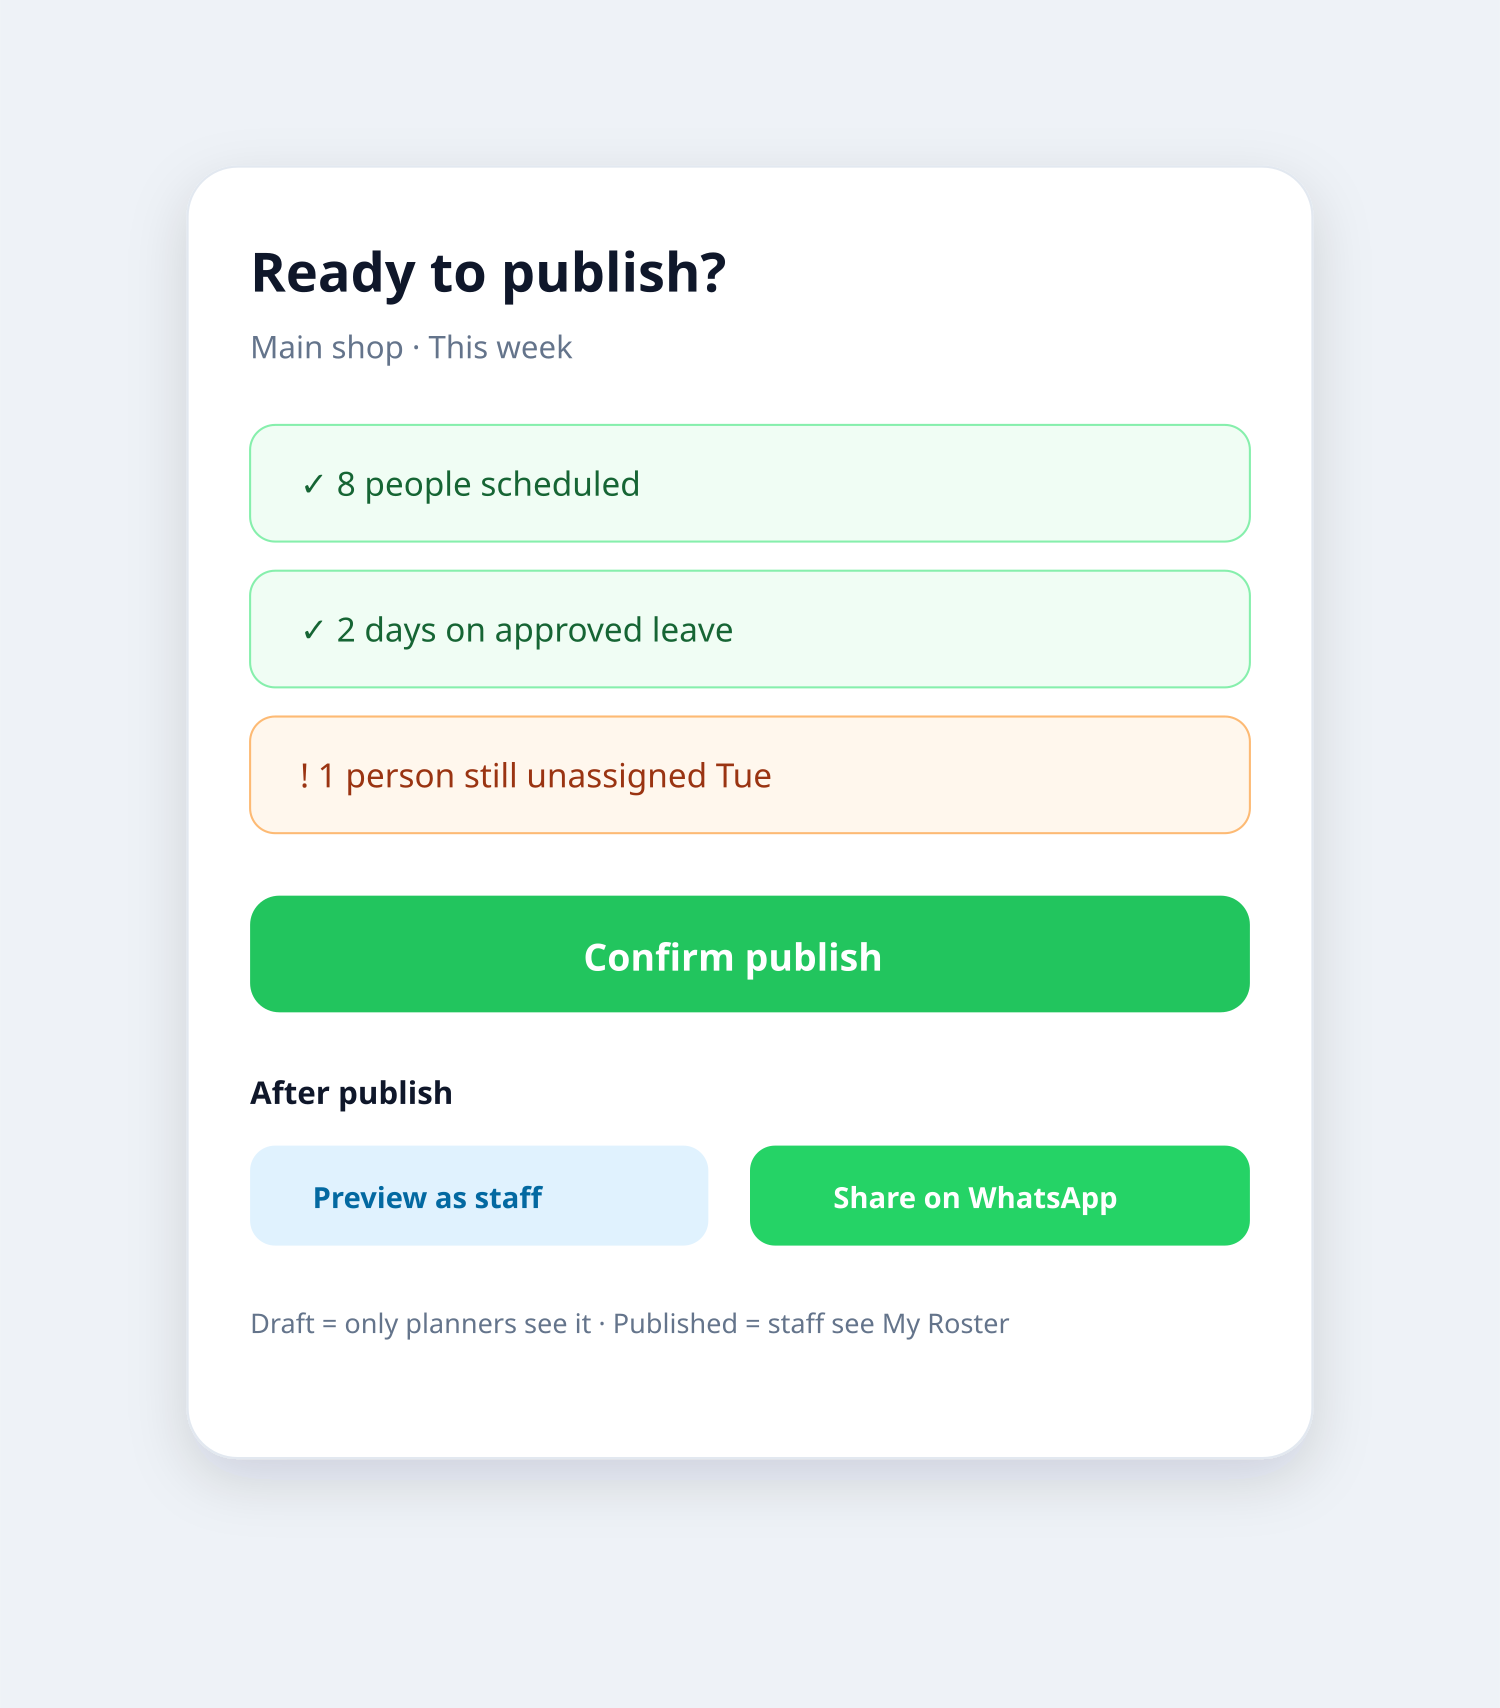
Publish → then share the link with staff Step 8
Step F — Share with staff
After publish, use Share roster / Preview as staff / Share on WhatsApp if offered. Faciro does not auto-send WhatsApp — you paste the link yourself. Staff open My Roster → Today or This week.
Step 9
Today view
Tap Today on Roster to compare planned vs actual: Present, Not clocked in, Late, On leave, Off, Missing out, Absent. Useful mid-shift without opening full Attendance.
Related guides